Knife Skills
How to become a Ninja in the kitchen!
Introduction
Hi, I’m Jenny Thomson from Courses for Cooks.
I’ve been teaching students how to use knives since 2011, helping them become more confident in the kitchen, inspiring them to eat a better diet and showing them skills to make them better cooks.
So why do you need to bother with knife skills?? Anyone can pick up a knife & cut things up, right?
True, it’s not difficult to pick up a knife and start cutting, but if you know the best way to do it with the right kind of knife, it will make your food preparation a lot easier, safer, more enjoyable and more successful, not to mention quicker!
This is my knife skills course, I hope you enjoy it!
What you will need to complete this course?
A standard cook’s knife and a non-slip chopping board.
Lesson 1 – Boards and Knives
Cutting Board
We’ll start with the cutting board, because you need a good, stable surface to cut on. There are lots of different kinds of boards on the market, here are the most important points to consider.
- You need a board which is bigger than A4 paper size – this is so that you have enough room to work
- The board is best to be non-slip – this is for safety, if the board moves as you’re chopping, the knife can slip and cut you more easily. You can either buy a board with non-slip edges, or use a non-slip mat, damp cloth or damp kitchen roll to put under your board and prevent it slipping.
- Plastic boards are good because they are soft for the knives to cut onto, food doesn’t tend to slip around on the surface and they can be disinfected, either by soaking in a disinfectant solution for ½ and hour or by putting them through a dishwasher.
- If you have a wooden board, be careful not to soak it in water as any joints can swell and split, leading to food scraps being lodged into the board and creating a harbour for bacteria. The board can also warp leading to an unstable surface and possible injury.
Here’s a quick video showing you some of the boards I like…
On to the Knife
One of the most commonly asked questions in my classes is ‘ What knives do I need?’ and ‘Do I need to buy a block of knives?’
There are a huge range of knives to choose from, the one you will use for 95% of all food preparation is the standard cooks’ knife. Other than that, you’ll need a bread knife with a serrated edge and a small utility knife for cutting fruit & any fiddley jobs, this knife can either be serrated or plain edged. Those are all the knives you need to start you off!
So what are you looking for in a cooks’ knife?
- The blade should be between 20 – 25cm long, or 32 – 35cm from the tip of the blade to the back of the handle.
- The blade & handle should be a continuous piece of steel.
- The knife should feel balanced in your hand & comfortable to hold

Lesson 2 – How to Hold the Knife and What to do With Your Other Hand
Watch this video on how to hold the knife, what to do with your holding hand and the basic cutting motion…
How to hold the knife
You need to hold the knife in a way that gives the most flexibility and control over the blade
- Have the handle of the knife resting in the palm of your hand
- Curl the last 3 fingers around the handle and pinch the heal of the blade with your thumb and forefinger.
- When you begin to cut, keep the blade of the knife on the board and use a rocking, sliding movement to cut ingredients.
What do you do with your other hand?
The way that you hold whatever you’re about to cut up is also important – you don’t want the food to slip and you don’t want to cut your fingers. There are 2 different safe ways of holding food about to be cut.
The bridge
- hold the food steady between your thumb and forefinger.
- Cut in between your fingers with the knife.
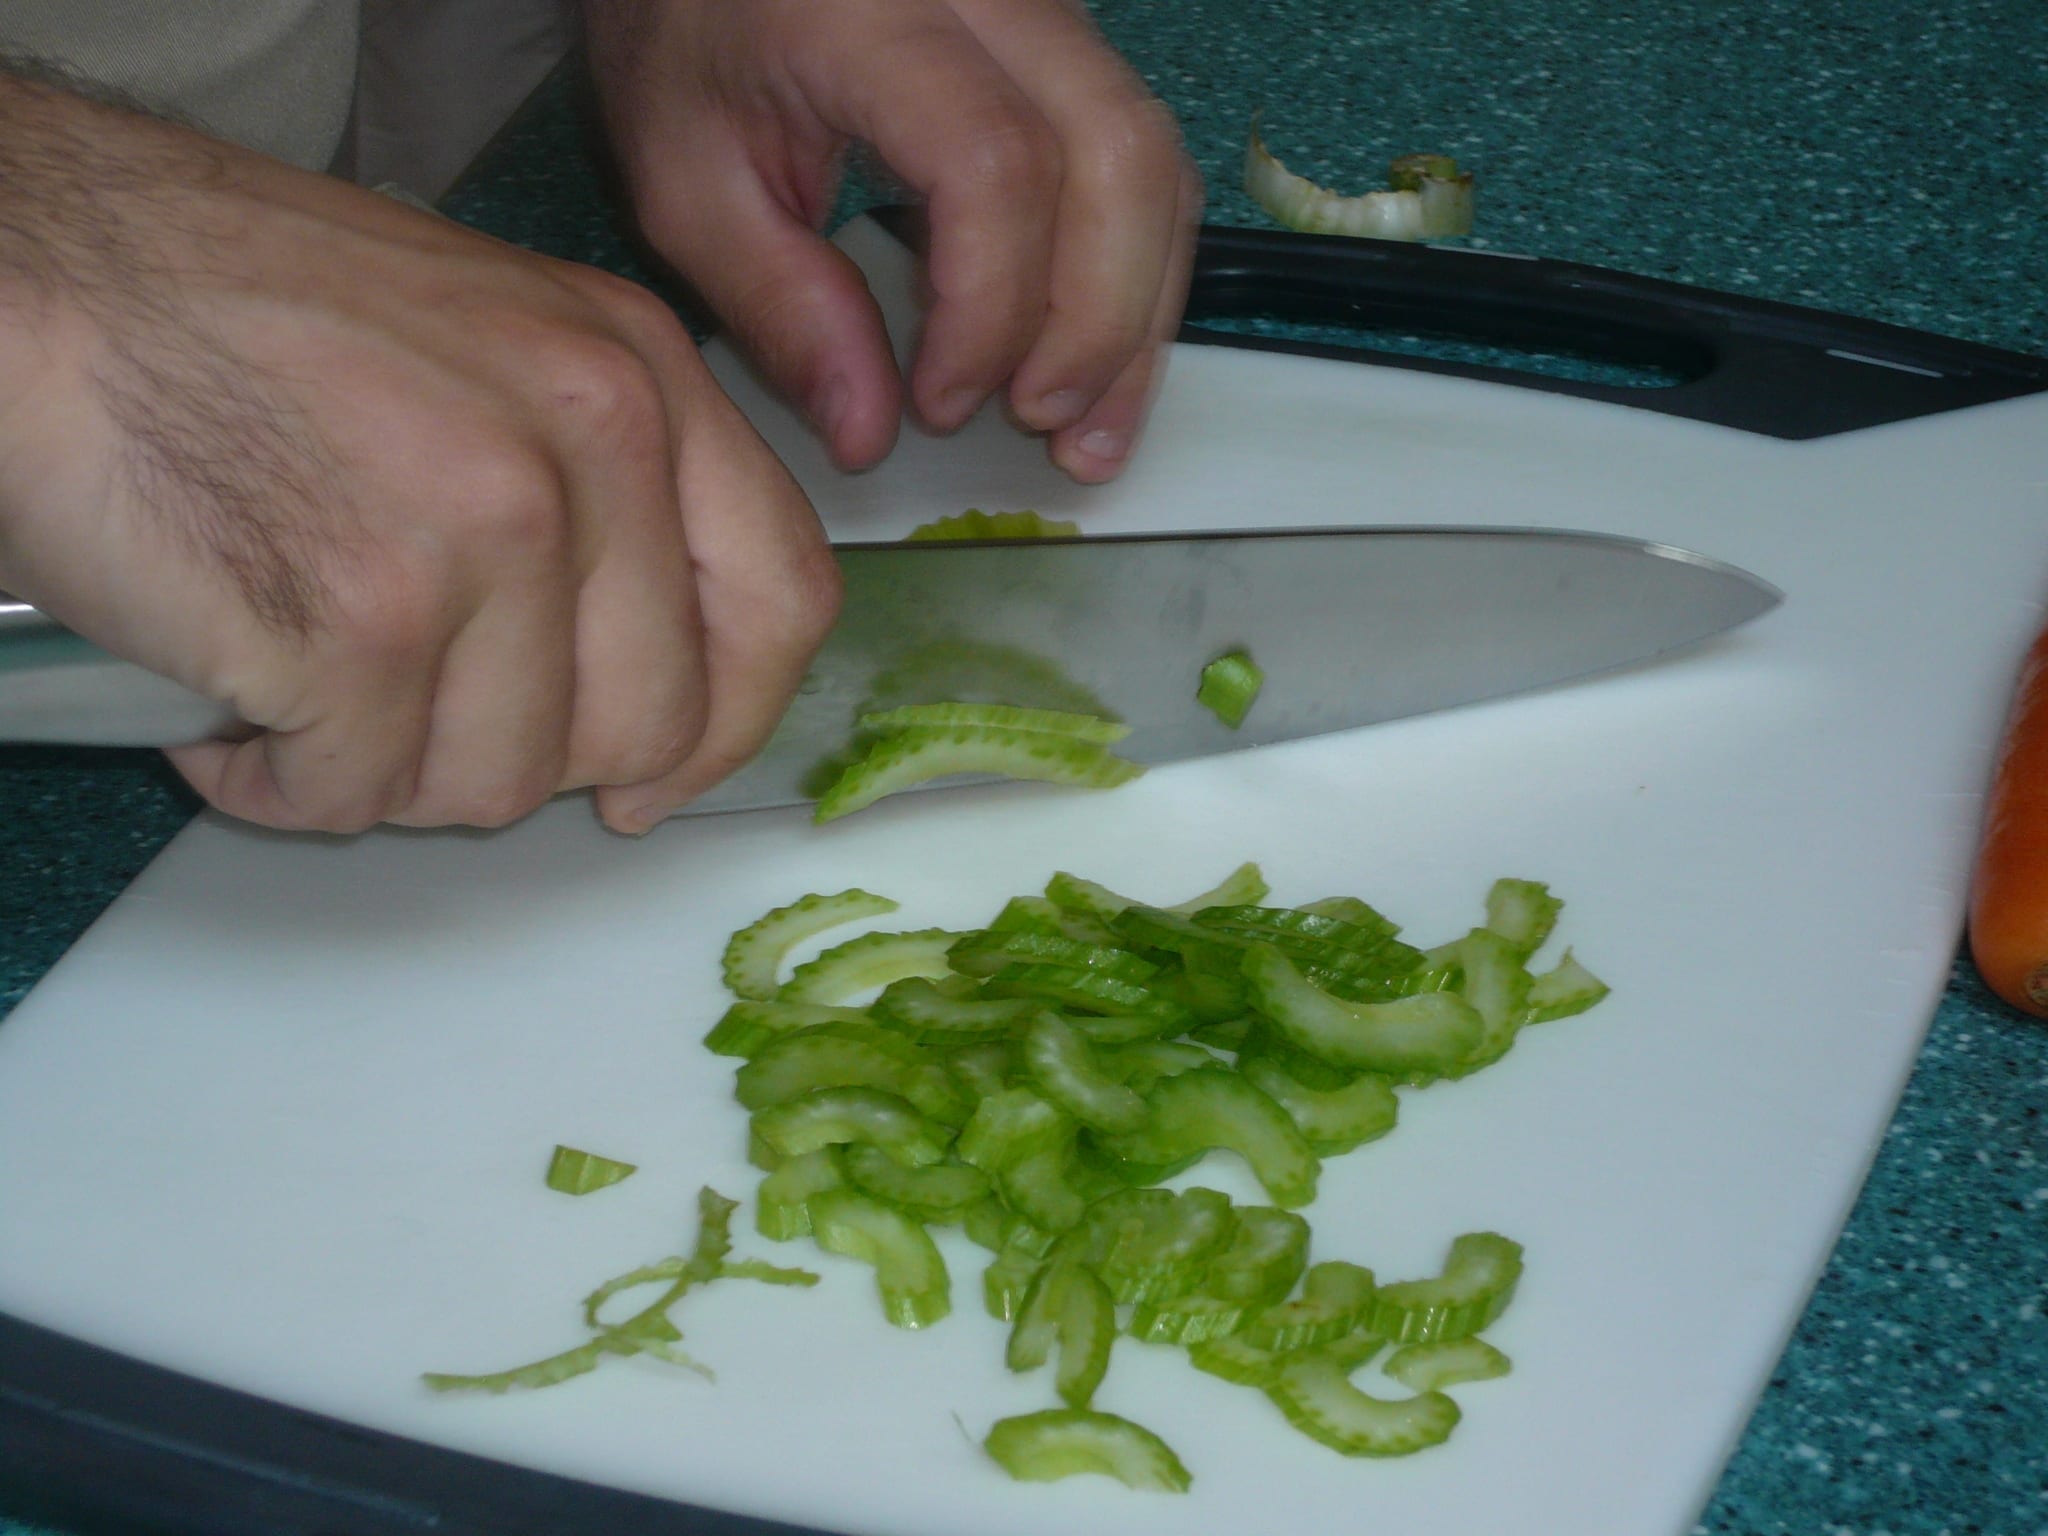
The claw
- Curl the fingers of your food holding hand around like a claw and rest the tips of your fingers on the food that you’re about to cut.
- Make sure your thumb is tucked in at the back.
- Begin cutting, moving your fingers back as you go.
- If the knife slips, it will slide against your knuckles or fingernails, but not be able to cut your fingertips.
Now, it’s time to start practicing.
- Make sure you’re holding the knife correctly. There is a tendency to slide back into bad habits, so check your hand every time you start to practice.
Before you start actually chopping anything.
- Practice the sliding motion of the knife and make sure you’ve got it right.
- Practice the claw and the feeling of the knife sliding down your knuckles
- Get yourself organised with onions, carrots & celery, work through the videos below slowly and carefully, concentrating on technique before speed.
REMEMBER you can re run the videos as often as you like
Take a look at the videos below, showing you different holding and chopping techniques…
Lesson 3 – Cleaning, Storing & Sharpening
How do you clean your knife?
Now that you’ve been practicing, what do you do with your knife after you’ve used it??
Use hot soapy water to clean your knife, then dry it and put it away.
- Always clean and dry the knife with the blade facing away from you.
How do you store your knife?
Knives can be stored
- In a dedicated drawer – this is best to be narrow so that the knives don’t move around too much as the drawer is opened and closed, leading to blunt knives. Store the knives with the handles at the front end of the drawer so that it is easy to choose a knife from the drawer without having to rummage & possibly cut yourself.
- On a magnetic strip – this is attached to the wall, again have all the knife handles on the same side to avoid cutting yourself.
- In a knife block – these usually come with the knives already in them, they’re stored on the work top
Sharpening knives
There is nothing worse than a blunt knife, it slows down food preparation and there’s a higher risk of you cutting yourself.
Ideally you should be sharpening your knife every time you use it – this keeps the blade honed and in good working order.
There are lots of sharpening tools on the market, some work better than others and what’s important is what works best for you.
Using a Steel
I use a steel, here are the basics on how to use one.
Find the optimum sharpening edge.
- To do this, brace the steel against your hip or table edge, somewhere it’s not going to slip.
- Grip the knife in your other hand and, with the blade facing you.
- Start at about a 20 degree angle and stroke the knife across the steel, flattening the angle as you go.
- When you feel the blade slip, you’ve gone past the edge, raise the blade back up a bit and you’re good to go.
Honing the knife
- Use a little pressure, stroke the knife edge across the top side of the steel for one side of the knife and across the bottom side of the steel for the other side.
- Test the sharpness of the blade every few strokes.
- If you do this every time you use your knife, you will only have to do it a couple of times each side to maintain your knife edge.
Homework & Practice
Now you need to practice your technique and accuracy in order to speed up your slicing and chopping.
Here are 4 recipes to try. I have included adaptations, hints and tips to suit most diets.
Thai Style Vegetable Soup
This is a delicious, easy, quick soup to make. It can be spiced up or down to suit any palate.
Click on the title for a pdf version of the recipe
Chicken Tagine with Butternut Squash, Lemon & Almonds
Travel to Morocco for a flavour hit, there’s also a vegetarian adaptation in the recipe.
Click on the title for the pdf.
Potato, Celeriac & Swede Gratin
This is a test of your precision slicing!
It’s also a delicious dish, the potato carbs are lightened by the swede and celeriac and give additional juiciness and flavour.
Click the title for your pdf.
Breakfast Fruit Salad
This is really refreshing first thing in the morning and keeps in the fridge for a couple of days.
Find a pdf in the title
Well done!
You’ve now completed this Knife Skills eCourse, I hope you’ve enjoyed it.
You should now be able to chop, slice and dice quite precisely. Keep practicing to increase speed and accuracy.
I’d love to know how you’re getting on with your chopping. Drop me a line to jenny@coursesforcooks.com and let me know how you enjoyed this course.