For some time now, I have been trying to find alternatives to cling film because it can’t be recycled.
I have some dishes with lids (not that many), I use plates to sit over the top of bowls (fine if they’re round), and tried out silicon bowl covers (good idea, but they don’t always cling. The edge of the dish has to be dry & they’re quite expensive). I still needed something that would suit the other 75% of bowls and dishes that I had in my cupboards.
A friend sent me a link for Moral Fibres bees wax covers & with the help of the post, I’ve now taken time to make some covers of my own.
Here’s how I did it, along with some hints and tips for success.
Ingredients
Bees wax – either blocks or pellets
Close woven cotton fabric
Non stick silicon paper
Equipment
Oven
Baking sheet
Pinking scissors
Scraper
Method
- Pre heat the oven to 100C
- Cut your fabric to size with the pinking shears, allow a 3cm margin all the way around
- Place the non stick silicon paper on to the baking sheet
- Place the fabric on the paper and scatter over a handfull of wax
- Place into the oven for a couple of minutes or until the wax has melted.
- Once the wax has melted, remove and scrape over the fabric with the scraper
- Remove the fabric from the non stick paper while still hot, flap it around a bit to set the wax and it’s ready to use.
Hints & Tips
How Much Bees Wax & What Kind?
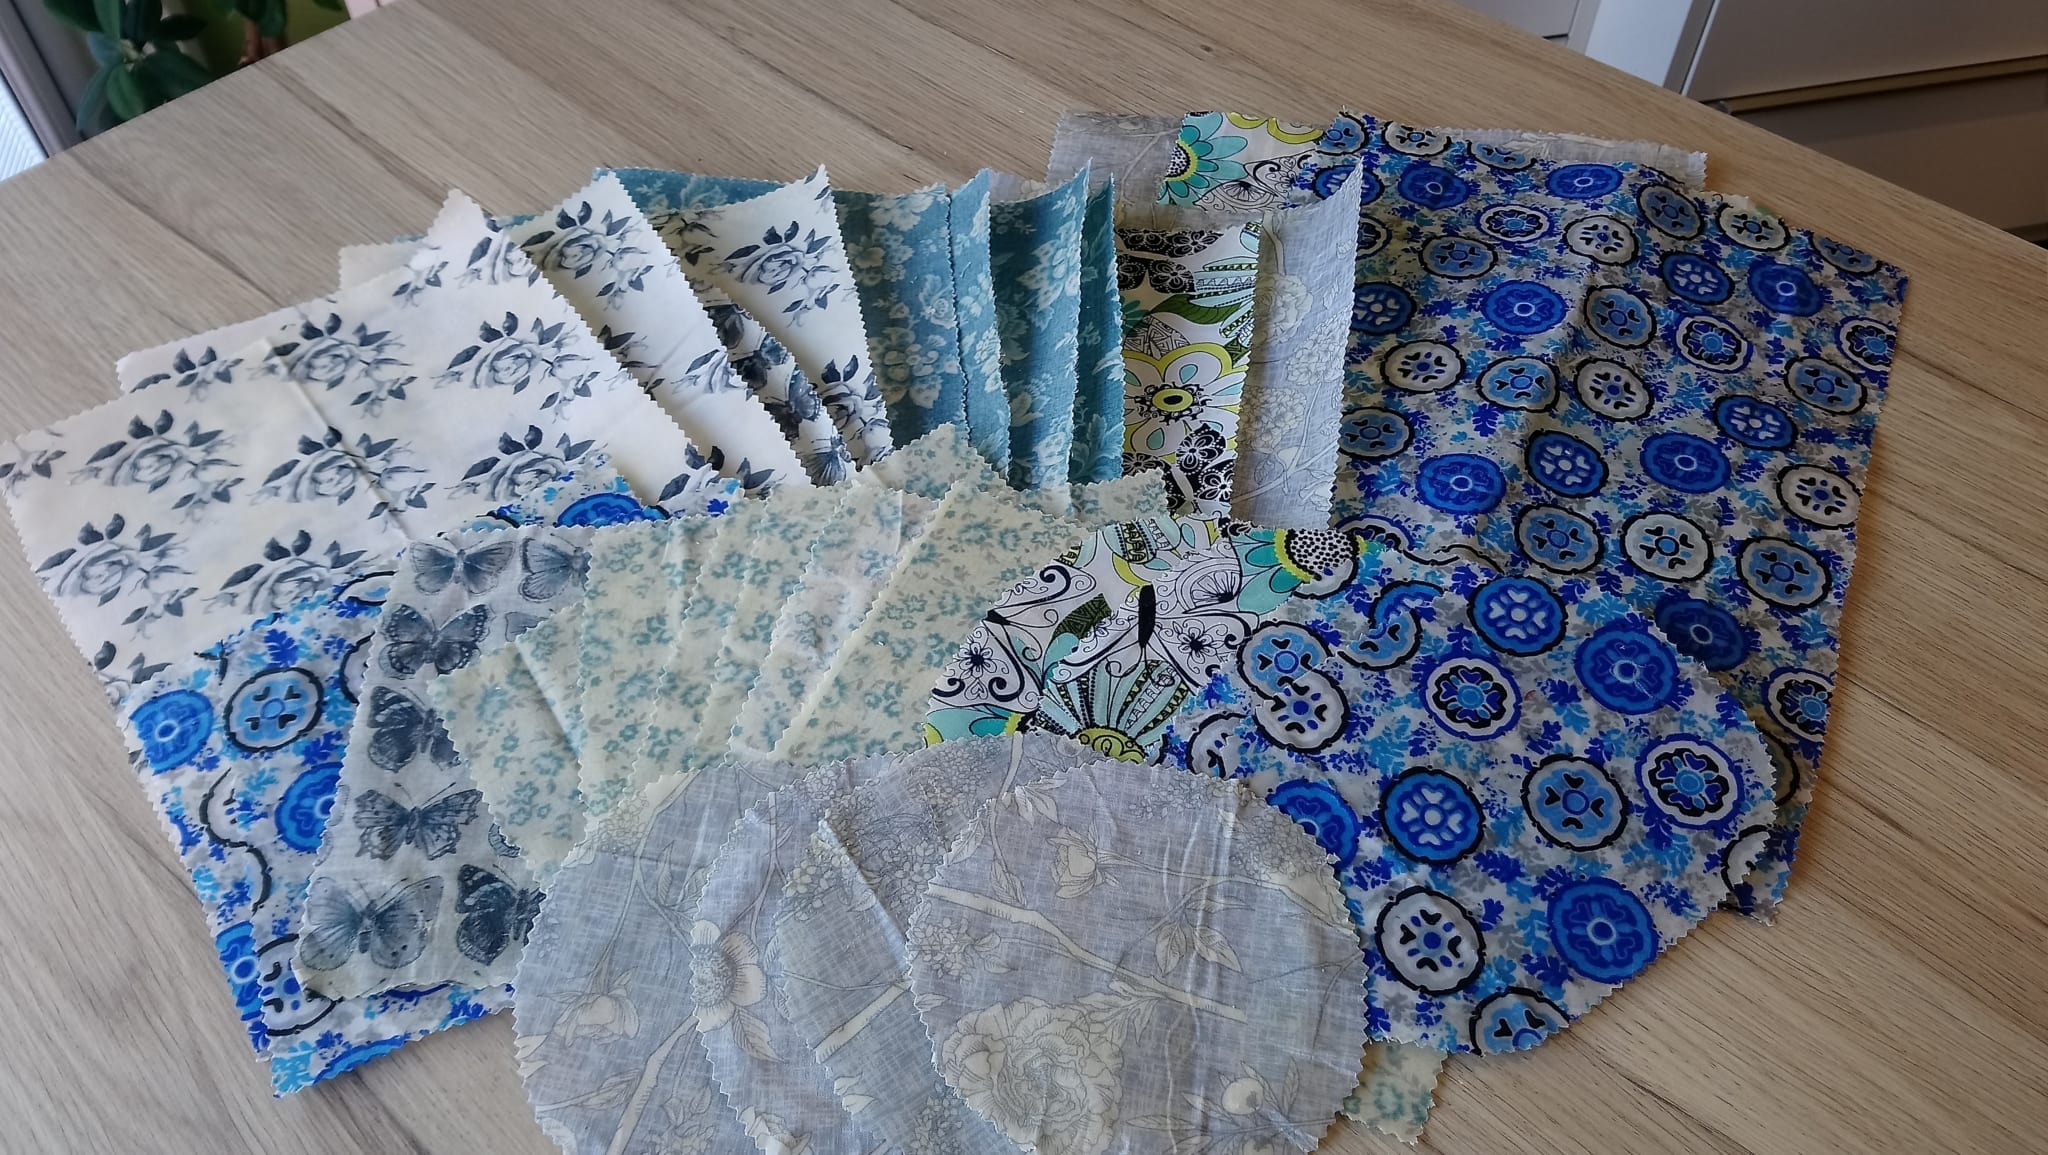
You don’t need a huge quantity of bees wax. I bought a 500g bag of pellets online and used about 1/4 of them for all the wraps in the picture at the top of this post.
If you have blocks of bees wax, you will need to grate it.
It doesn’t matter if you buy white or yellow bees wax. Bees wax naturally turns yellow the more it is heated but the properties stay the same.
What Fabric?
Fabric can be anything that is closely woven & cotton. I had ‘fat squares’ for patchwork, you can buy fabric that you like or recycle – eg. men’s shirts if the collar has frayed, a skirt or dress that you don’t wear anymore… it just has to be cotton.
Top Tips for Melting & Spreading
Bees wax melts at around 63C and sets very quickly. Only keep it in the oven until it has melted.
Have a pad of fabric to put the baking sheet on when it comes out of the oven, this gives you longer to spread the wax onto parts of the fabric that have missed the wax.
How Waxy Should the Fabric Be?
You only want enough wax on the fabric to soak into the fibers of the cloth. If you find you have excess wax on the back of your wrap, the easiest way is to flip it over, put another piece of fabric on top & pop it back into the oven. The new piece of fabric with soak up the excess wax. This also speeds up the process of making the wraps, I made about 6 at a time by stacking the fabric up with wax pellets in between them.
Cleaning up
Don’t use your best utensils, bees wax is difficult to clean off things, choose utensils that you can either save for the same job again or discard.
Bees wax will stick to surfaces and utensils, try to work cleanly. If you need to clean oven trays and utensils after use, place the items in a bowl, immerse the items in scalding hot water to melt the wax, which will float on the surface of the water. Leave everything where it is until the water is cool, then skim off the wax and put in the bin or save to use again. Do Not drain it down the sink as you will block your pipes!
Caring for Your Wraps
Store in a drawer or container, wash with cool, soapy water & air dry.
Do Not use in a dishwasher, microwave, oven or washing machine.
Don’t drape the wraps over a radiator or put into a tumble dryer to dry them.
Use to cover cold or cool food, avoid contact with strong colours, flavours or raw meat.
Different Wrapping Techniques
See the videos below…
What To Do When The Wrap Stops Wrapping!
Eventually with use your wraps may stop staying in place when you’re wrapping things. It’s easy to refresh your wrap, just pop it back in the oven for a couple of minutes, the wax will re-melt bringing the fabric back to it’s waxy former self, (see the video below).

